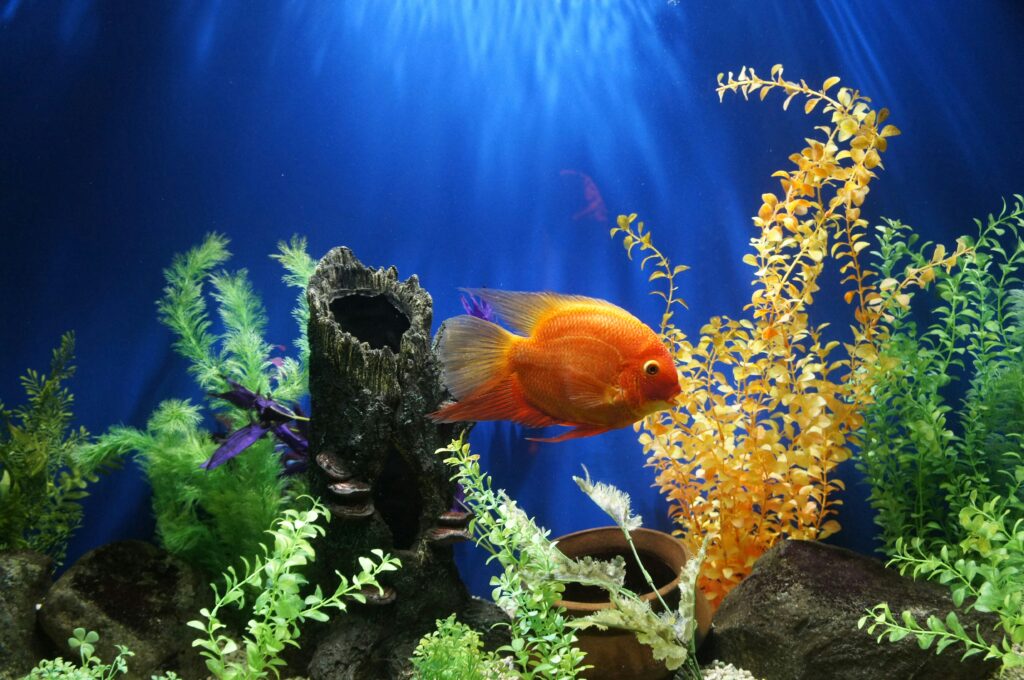
Setting up a fish tank for the first time is one of the most rewarding pet projects available — and one of the most commonly misstarted. According to the Aquarium Co-Op’s beginner fishkeeping research, the most common cause of fish loss in new aquariums is new tank syndrome — the ammonia toxicity that occurs when fish are added to tanks that have not completed the nitrogen cycle, a process that most pet store staff fail to explain and that most first-time aquarium guides treat as optional detail rather than the essential foundation of successful fishkeeping that it actually is.
The beginner who goes to a pet store, buys a tank and fish on the same day, sets everything up, and then watches their fish die within a week is not experiencing bad luck. They are experiencing the entirely predictable outcome of skipping a biological process that the aquarium requires before it can support fish life.
This guide tells you everything the pet store did not — from choosing the right tank size through the complete setup process, the nitrogen cycle that determines whether fish survive their first week, water parameters that determine whether they thrive long-term, and the fish selection decisions that determine whether your first aquarium is a satisfying success or a series of frustrating losses.
Knowing how to set up a fish tank for the first time the right way means understanding not just the physical steps but the biological ones — and this guide covers both in the specific sequence that produces genuinely successful first tank outcomes.
Steps on How to Set Up a Fish Tank for the First Time
If you want to know how to setup a fish tank for the first time, following are he important steps you must follow:
Step 1: Choose the Right Tank Size
The instinct to start small is understandable and often leads beginners in the wrong direction. Here is the counterintuitive reality that experienced fishkeepers consistently emphasize: smaller tanks are harder to keep healthy than larger ones.
Water chemistry in a small tank — anything under 10 gallons — changes rapidly. A tiny amount of fish waste spikes ammonia to dangerous levels within hours in 5 gallons of water. The same fish waste in 20 gallons dilutes to a fraction of the concentration and rises much more slowly — giving you time to notice and respond to water quality changes before they reach crisis levels.
For most first-time fishkeepers, a 10 to 20-gallon tank is the sweet spot. It is genuinely manageable in apartment settings, not overwhelming to maintain, and large enough to keep water parameters stable enough for beginner success. A 10-gallon tank suits a betta with a small community, a single species school of nano fish, or a few small community fish. A 20-gallon tank opens up the species options and provides more biological stability that makes learning the hobby significantly less stressful.
If you have a specific location in mind, measure it before purchasing any tank. A filled aquarium weighs approximately 8 to 10 pounds per gallon — a 20-gallon tank weighs 160 to 200 pounds when filled. Confirm that the surface it will sit on can support this sustained weight before committing to a tank size.
Step 2: Gather Your Equipment Before Setting Up
The equipment list for a successful first aquarium is not complicated but it is specific. Every item on this list serves a purpose that the tank cannot do without.
The tank itself — Glass is the recommended material for beginners. It does not scratch as easily as acrylic, it does not yellow over time, and it maintains optical clarity indefinitely with proper care. Most starter kits include the tank as part of a complete package.
A filter rated for your tank size — The filter is the most critical piece of equipment in any aquarium. It houses the beneficial bacteria that process fish waste into non-toxic compounds. The filter rating on the packaging should match or exceed your tank volume — a filter rated for 20 gallons on a 20-gallon tank, or a filter rated for 30 gallons for added biological filtration capacity. Do not skip or downsize the filter.
A heater for tropical fish — If you plan to keep tropical fish — which includes most of the commonly available species including bettas, tetras, guppies, and corydoras — a heater that maintains the water between 75°F and 80°F is essential. Cold water stresses tropical fish and suppresses their immune system, leading to disease susceptibility regardless of water quality.
A thermometer — Separate from the heater. The heater has a set temperature but a separate thermometer confirms the actual water temperature independently. This matters because heater calibration is not always precise and knowing the actual temperature rather than trusting the set temperature is important for fish health.
A water conditioner — Tap water contains chlorine and chloramines that are lethal to fish and to the beneficial bacteria that the filter needs to establish. Water conditioner neutralizes these chemicals instantly and must be added to every volume of tap water before it contacts fish or filter media.
A test kit — The liquid test kit for ammonia, nitrite, nitrate, and pH is the diagnostic tool that tells you what is actually happening in your water rather than what you hope is happening. API Master Test Kit is the most commonly recommended starter option. Test strips provide faster but less accurate results — the liquid kit is worth the additional complexity for the accuracy that first-time cycling requires.
Substrate — The gravel, sand, or planted tank substrate that covers the tank bottom. Rinse substrate thoroughly before adding it to the tank — the dust it contains will cloud the water for days if not pre-rinsed.
A lid — Fish jump, especially under stress. A lid is a safety essential rather than an optional aesthetic addition.
Step 3: The Physical Setup
With all equipment gathered, the physical setup follows a specific sequence that prevents the most common setup mistakes.
Rinse everything — the tank, substrate, decorations, and any equipment surfaces that will contact water — with plain water only. No soap, no detergent, no cleaning products. Even trace soap residue is toxic to fish and beneficial bacteria.
Add the rinsed substrate to the tank floor to a depth of approximately two to three inches — enough to allow beneficial bacteria to colonize the substrate surface and enough depth for any plants you plan to add to root effectively.
Fill the tank with conditioned water — add water conditioner to the water volume before or immediately after filling, following the bottle’s dosing instructions. A plate placed on the substrate while filling prevents the force of the water flow from disturbing the substrate arrangement.
Install the filter, heater, and thermometer according to their specific instructions. Turn on the filter and heater and allow the tank to run for 24 to 48 hours before beginning the cycling process. This run-in period allows the heater to bring the water to temperature and confirms that all equipment is functioning correctly before the biological process begins.
Step 4: The Nitrogen Cycle
This is the step that most beginners skip and most fish losses trace back to. Read this section carefully because understanding it is the difference between a successful first tank and a series of preventable fish deaths.
What the nitrogen cycle is:
Fish produce waste that breaks down into ammonia — a compound that is directly toxic to fish even in small concentrations. Beneficial bacteria called Nitrosomonas bacteria colonize the filter media and substrate and convert ammonia into nitrite. A second bacterial species called Nitrobacter then converts nitrite into nitrate. Nitrate is far less toxic than ammonia or nitrite and is managed through regular partial water changes.
This bacterial colonization — the establishment of both bacterial species in sufficient numbers to process the waste load your fish will produce — is the nitrogen cycle. It takes three to six weeks in a new tank. During this period ammonia and nitrite levels rise and fall as each bacterial population establishes, and the tank is not ready to safely house fish until the cycle is complete.
How to cycle your tank:
The fishless cycling method is the safest approach for most beginners — establishing the cycle without any fish present and therefore with no risk of ammonia toxicity causing fish loss during the process.
Add a source of ammonia to the tank without fish present — pure ammonia at a concentration of approximately 2 to 4 ppm (your test kit measures this) provides the food source that the beneficial bacteria need to establish. Dosing with fish food that decomposes is an alternative ammonia source but is less predictable than liquid ammonia in terms of the concentration produced.
Test the water every two to three days using your liquid test kit. You are looking for the following sequence: ammonia rises, then begins to fall as Nitrosomonas bacteria establish. Nitrite appears as ammonia is being converted, rises, and then begins to fall as Nitrobacter bacteria establish. Nitrate appears as nitrite falls. When ammonia and nitrite both consistently read zero and nitrate is detectable, your cycle is complete and the tank is ready for fish.
This process typically takes three to six weeks. It cannot be meaningfully rushed, and adding fish before it is complete exposes them to the ammonia and nitrite toxicity that new tank syndrome describes.
Speeding the cycle safely:
Established filter media or gravel from a healthy existing tank contains the beneficial bacteria that a new tank needs to establish — adding a small amount of this established media dramatically reduces the cycling time by introducing a bacterial seed population rather than waiting for bacteria to colonize from nothing. If you know someone with an established healthy aquarium, a cup of their gravel or a piece of their used filter media in your new tank can reduce cycling time to one to two weeks.
Step 5: Test Your Water Before Adding Fish
When your test kit shows ammonia at zero, nitrite at zero, and measurable nitrate, perform a large partial water change — approximately 50 percent of the tank volume — to reduce the accumulated nitrate before fish are introduced. This water change also refreshes the mineral content of the water that extended cycling can deplete.
Retest after the water change. If ammonia and nitrite remain at zero after the water change, your cycle is complete and stable. You are ready to add fish.
Confirm the water temperature matches the requirements of the fish species you plan to add — generally 75°F to 80°F for most tropical community fish. Check the pH as well — most tropical community fish thrive between 6.5 and 7.5 pH, and your tap water’s pH is often within this range without adjustment.
Step 6: Choosing and Adding Your First Fish
Fish selection for a first tank:
The most common beginner fish selection mistake is choosing based on appearance at the pet store without researching adult size, temperament, and tank requirements before purchase. The fish that looks beautiful in a small display tank at the pet store may grow to a size that overcrowds your home tank, require water conditions your tank cannot provide, or be aggressive toward the other species you planned to add alongside it.
The beginner-friendly fish species that consistently succeed in appropriately sized, properly cycled tanks include:
For a 10-gallon tank — A single male betta fish with small peaceful companions like pygmy corydoras or small snails. A school of ten to twelve neon tetras or ember tetras. A group of six to eight guppies.
For a 20-gallon tank — A peaceful community combining a school of tetras, a small group of corydoras catfish, and one or two dwarf gourami. A planted tank with small rasboras and shrimp. A species tank with a school of harlequin rasboras.
The acclimation process:
Never add fish directly from the pet store bag to your tank water — the temperature difference between the bag water and tank water causes shock that stresses or kills fish regardless of how healthy they were in the store.
Float the sealed bag in the tank water for fifteen to twenty minutes to equalize temperature. Then gradually add small amounts of tank water to the bag over another fifteen minutes to equalize water chemistry. Net the fish from the bag into the tank and discard the bag water — pet store water may contain pathogens from the store system.
Stocking gradually:
Add fish in small groups over several weeks rather than fully stocking the tank on day one. Each addition increases the biological load that the filter must process, and gradual additions allow the bacterial colony to grow incrementally alongside the waste load rather than being overwhelmed by a sudden large increase.
Step 7: Ongoing Water Maintenance
A successful fish tank is not a set-and-forget environment. The weekly and monthly maintenance that keeps water parameters healthy is the ongoing commitment that aquarium keeping requires and that beginners must understand before they purchase fish.
Weekly partial water changes of 20 to 30 percent of the tank volume replace nitrate-accumulated water with fresh conditioned water — the single most important ongoing maintenance task in any aquarium. Use a gravel vacuum during water changes to remove the fish waste and uneaten food that accumulates in the substrate and contributes to nitrate accumulation.
Weekly testing for ammonia, nitrite, and nitrate during the first month of fish keeping provides the early warning that any water quality issue requires. An established healthy tank can be tested less frequently once parameters are consistently stable.
Filter maintenance — cleaning filter media every four to six weeks in tank water rather than tap water. Rinsing filter media in tap water kills the beneficial bacteria that the media houses — always use water removed from the tank during a water change for filter media rinsing.
The fish tank that is properly set up cycled and stocked with appropriate fish for the tank size provides years of the peaceful beautiful living display that makes aquarium keeping one of the most consistently satisfying pet hobbies available. If you are still deciding whether fish are the right pet choice for your home and lifestyle check out our complete guide on how to choose the right pet for your apartment, the honest factor-by-factor guide that covers noise space budget and commitment for every common pet type.
All guidance in this article is based on current aquarium science and genuine fishkeeping expertise from the beginner through intermediate experience levels. For the specific tank kits that include everything you need to start this setup process check out our complete guide to the best aquarium starter kits for beginners, the top 10 picks that provide filter lighting and tank in one coordinated purchase.
Frequently Asked Questions
Q: How long does the nitrogen cycle take in a new fish tank?
A: Typically three to six weeks for a fishless cycle using liquid ammonia as the bacteria food source. Adding established filter media from a healthy tank can reduce this to one to two weeks by seeding the tank with an existing beneficial bacteria population. The cycle is complete when ammonia and nitrite both consistently read zero on your liquid test kit over several consecutive days of testing.
Q: Can I put fish in a new tank without cycling it?
A: You can, but the fish will be exposed to rising ammonia and nitrite levels during the cycle — the new tank syndrome that is the most common cause of fish loss in beginner aquariums. If you must add fish before cycling is complete, perform daily 25 to 30 percent water changes to keep ammonia and nitrite levels below toxic thresholds, and use the liquid test kit daily to monitor levels. This is significantly more work and more fish-stressful than a fishless cycle.
Q: What is the easiest fish to keep for a first tank?
A: Bettas are frequently recommended for their hardiness and tolerance of slightly imperfect water conditions compared to other tropical fish. They do require a heater and at least five to ten gallons of space despite frequent small-tank marketing. For a community tank, guppies, platies, and danios are among the most forgiving of beginner water quality management imperfections while remaining genuinely beautiful and engaging fish.
Q: How often should I feed my fish?
A: Once or twice daily in amounts that fish consume completely within two to three minutes. Uneaten food sinks, decomposes, and produces ammonia that directly harms water quality. Overfeeding is significantly more common than underfeeding in beginner tanks and is a major contributor to water quality problems. Fish can safely go two to three days without food — when in doubt about feeding amount, feed less rather than more.
Q: Why is my aquarium water cloudy after setup?
A: Cloudiness immediately after setup is typically substrate dust and air bubbles from new equipment — it clears within 24 to 48 hours of filtration running. Cloudiness that develops after adding fish is typically a bacterial bloom — a rapid increase in free-floating bacteria that often accompanies the early stages of the nitrogen cycle. Bacterial bloom cloudiness clears on its own as the cycle progresses and the bacterial population stabilizes. Do not perform large water changes to clear bacterial bloom — it disrupts the cycling process more than the temporary cloudiness does.
Conclusion
Setting up a fish tank for the first time successfully requires understanding the biology, not just the equipment. The tank, filter, heater, and decorations are the physical setup. The nitrogen cycle is the biological setup that makes the physical equipment actually work for sustaining fish life. Beginners who understand both before they buy fish avoid the most common and most discouraging first tank failures entirely.
Take your time with the setup and the cycle. The four to six weeks between filling the tank and adding your first fish feel slow when you are excited about the aquarium you have just set up. But the healthy, thriving fish that populate a properly cycled tank on week six make that patience entirely worthwhile — and the fish losses that impatient stocking produces on week one are entirely avoidable with the knowledge this guide provides.
Explore the complete collection of fish and aquarium care guides at TopPetAccessories.com — Top Pet Accessories Blogs Page — for everything you need to make your first aquarium a beautiful, healthy, and long-lasting success. For the dog travel safety upgrade that protects your dog and your car interior on every journey check out our complete guide to the best dog car seats for safe and comfortable road trips — 10 brilliant picks for every dog size and vehicle setup.